Introduction:
"Generative AI" refers to models or algorithms that are used to create new content, including text, images, music, and even complete software code. It does this by analyzing the patterns and connections found in existing data and using those patterns to generate new data that is similar to, but not identical to, the original data. It is a rapidly growing field with many potential applications, such as creating convincing dialogue for chatbots, generating fresh marketing materials, or developing innovative scientific concepts.
This blog post will show you how to integrate the generative AI model into your Mendix Application using the Vertex AI API. We will show how to authenticate in Google Cloud and call the API to generate the response. Let’s dive in. 🚀
- Before you start, please ensure you have the following in place:
-
Google Cloud Account : If you don't already have a Google Cloud account, you can create one by visiting Google Cloud's registration page.
-
Enable Vertex AI API : After creating your Google Cloud account and logging in, enable the Vertex AI API by following these steps:
- - Go to the Google Cloud Console.
- - In the left navigation pane, click on "APIs & Services," and then select "Dashboard."
- - Click on the "+ ENABLE APIS AND SERVICES" button.
- - Search for "Vertex AI API" in the search bar and select it.
- - Click the "Enable" button to activate the Vertex AI API for your account.
-
Service Account Setup: Now, let's set up a service account on Google Cloud with the appropriate roles. Here's how:
- - In the Google Cloud Console, navigate to "IAM & Admin" and then "Service Accounts."
- - Click on the "Create Service Account" button.
- - Follow the prompts to provide a name and description for your service account.
- - Assign the necessary roles to the service account based on your project requirements.
-
Service Account Key: After creating the service account, generate a service account key in JSON format. Here are the steps:
- - Locate your newly created service account in the "Service Accounts" section.
- - Click on the account name to access its details.
- - Go to the "Keys" tab and click on the "Create a new key" button.
- - Select the format as "JSON" and confirm. This will automatically download your credential file.
Remember to keep this JSON credential file secure, as it's essential for authentication, and it cannot be re-downloaded. If you lose it, you'll need to create a new key following the same process.
Authentication on Google Cloud :
To authenticate with Google Cloud using OAuth 2.0, you can follow these steps to integrate it into your Mendix application:
1.Download Google API Client Library for Java:
Start by downloading the Google API client library for Java. You can obtain it from here. Once downloaded, copy all the files from the "libs" folder and paste them into your Mendix application's "userlib" folder.
2.Create a Java Action in Mendix
Within your Mendix application, create a Java action. This action should accept a File object as a parameter, which I have name it as "CredentialFile." In your Java action, include the following import statements:
import com.mendix.core.Core;
import com.google.api.client.googleapis.
auth.oauth2.GoogleCredential;
3.Java Action Code for Generating the Access Token:
IContext ctx = getcontext();
Inputstream credentialFileInputstream = null;
GoogleCredential credential = null;
String accessToken = null;
credentialFileInputstream = Core-getFileDocumentContent(ctx, _CredentialFile);
if (credentialFileInputStream != null) {
credential = GoogleCredential.fromStream
(credentialFileInputstream)
• createscoped
(Collections. singleton
("https://www.googleapis.com/auth/cloud-platform"));
credential.refreshToken();
accessToken = credential. getAccessToken() ;}
This code retrieves the content of the credential file as an InputStream, creates a GoogleCredential instance from it, scopes it for the necessary permissions (in this case,"https://www.googleapis.com/auth/cloud-platform"), and then refreshes and retrieves the access token.
It is important to note that this token is valid for one hour only. Once expires, we must create a new token using the JSON key file again. Therefore, you should implement a mechanism to handle token renewal when it expires automatically within your application.
With the access token, we can proceed to make API calls to PaLM AI in the Vertex AI Generative Studio
PaLM 2:
The PaLM 2 is an advanced language model offering enhanced multilingual reasoning and coding abilities. The Vertex AI PaLM API comprises the publisher endpoints for Google's PaLM 2, which are large language models that generate text and code in response to natural language prompts.
The Vertex AI PaLM API offers a variety of PaLM 2 models
PaLM API for textis fine-tuned for language tasks such as classification, summarization, and entity extraction.
PaLM API for chat is fine-tuned for multi-turn chat, where the model keeps track of previous messages in the chat and uses them as context for generating new responses. Additionally, Vertex AI offers another generative AI model, which you can explore further here. In this example, we will demonstrate how AI can transform a paragraph into an email format using PaLM API for text.
API Endpoint:
POST:
https://us-central1-aiplatform.googleapis.com
/v1/projects/{PROJECT_ID}/locations/
us-central1/publishers/google/
models/{MODEL_ID}:predict
We can call this endpoint along with the required parameter in the request body and authentication code that we generated previously. We are using the text-bison model for this example.
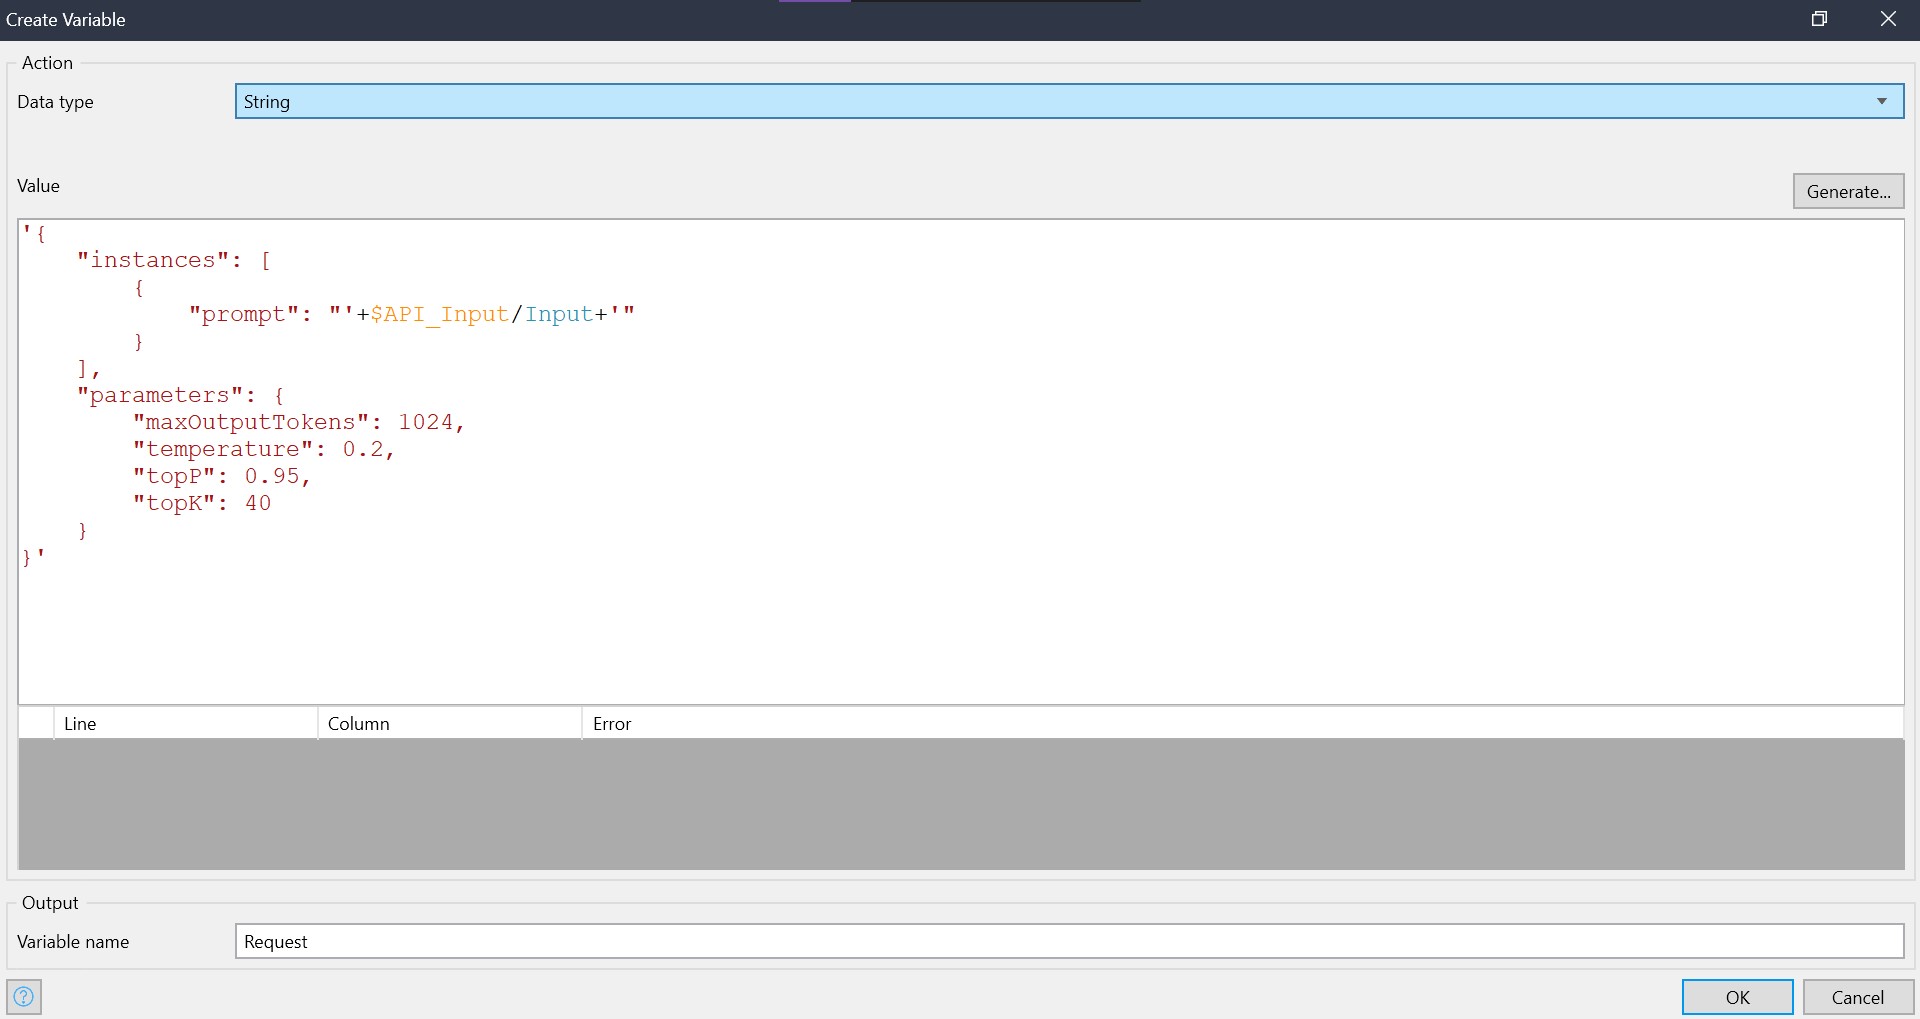
Request body will look like this
{ "instances": [ { "prompt": "PROMPT"} ], "parameters": { "temperature": TEMPERATURE, "maxOutputTokens": MAX_OUTPUT_TOKENS, "topP": TOP_P, "topK": TOP_K }}
Prompt: This is the text ou give to the model to generate a response
Temperature: It controls how random or focused the response is, with values ranging from 0.0 to 1.0. Lower values make it more focused and predictable, while higher values make the response more creative and random.
Max Output Tokens: This sets the length limit for the response (1–2048).
Top-K: This decides how the model picks the next word (1–40). Higher values make it more random. The default top-K is 40.
Top-P:It influences word selection based on probability (0.0–1.0). Higher values make it more random. The default top-P is 0.95.
For additional information on the parameters, please refer to the documentation.
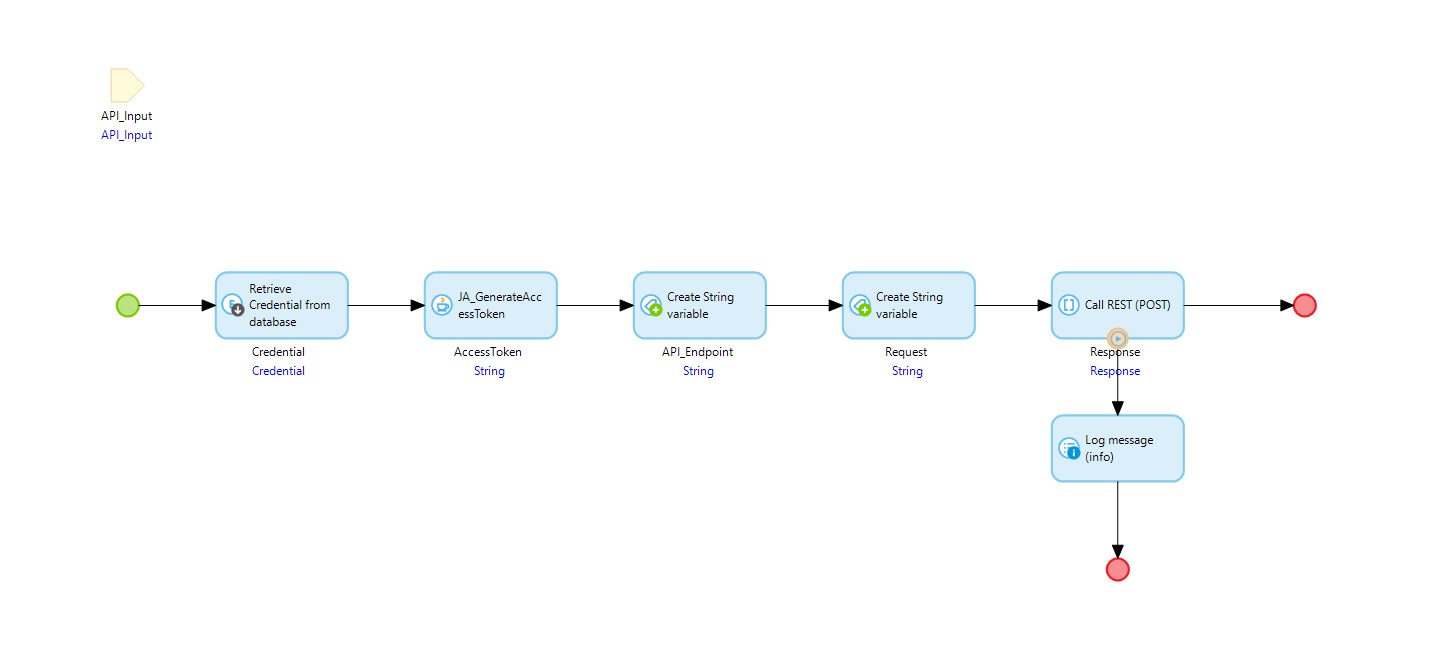
Example Request:
1.Add an HTTP POST request in your Microflow to the API endpoint
2.Include a header with the name "Authorization" and set the value to the access token generated using your Java action. Make sure to prefix the access token with "Bearer" to indicate the token type.
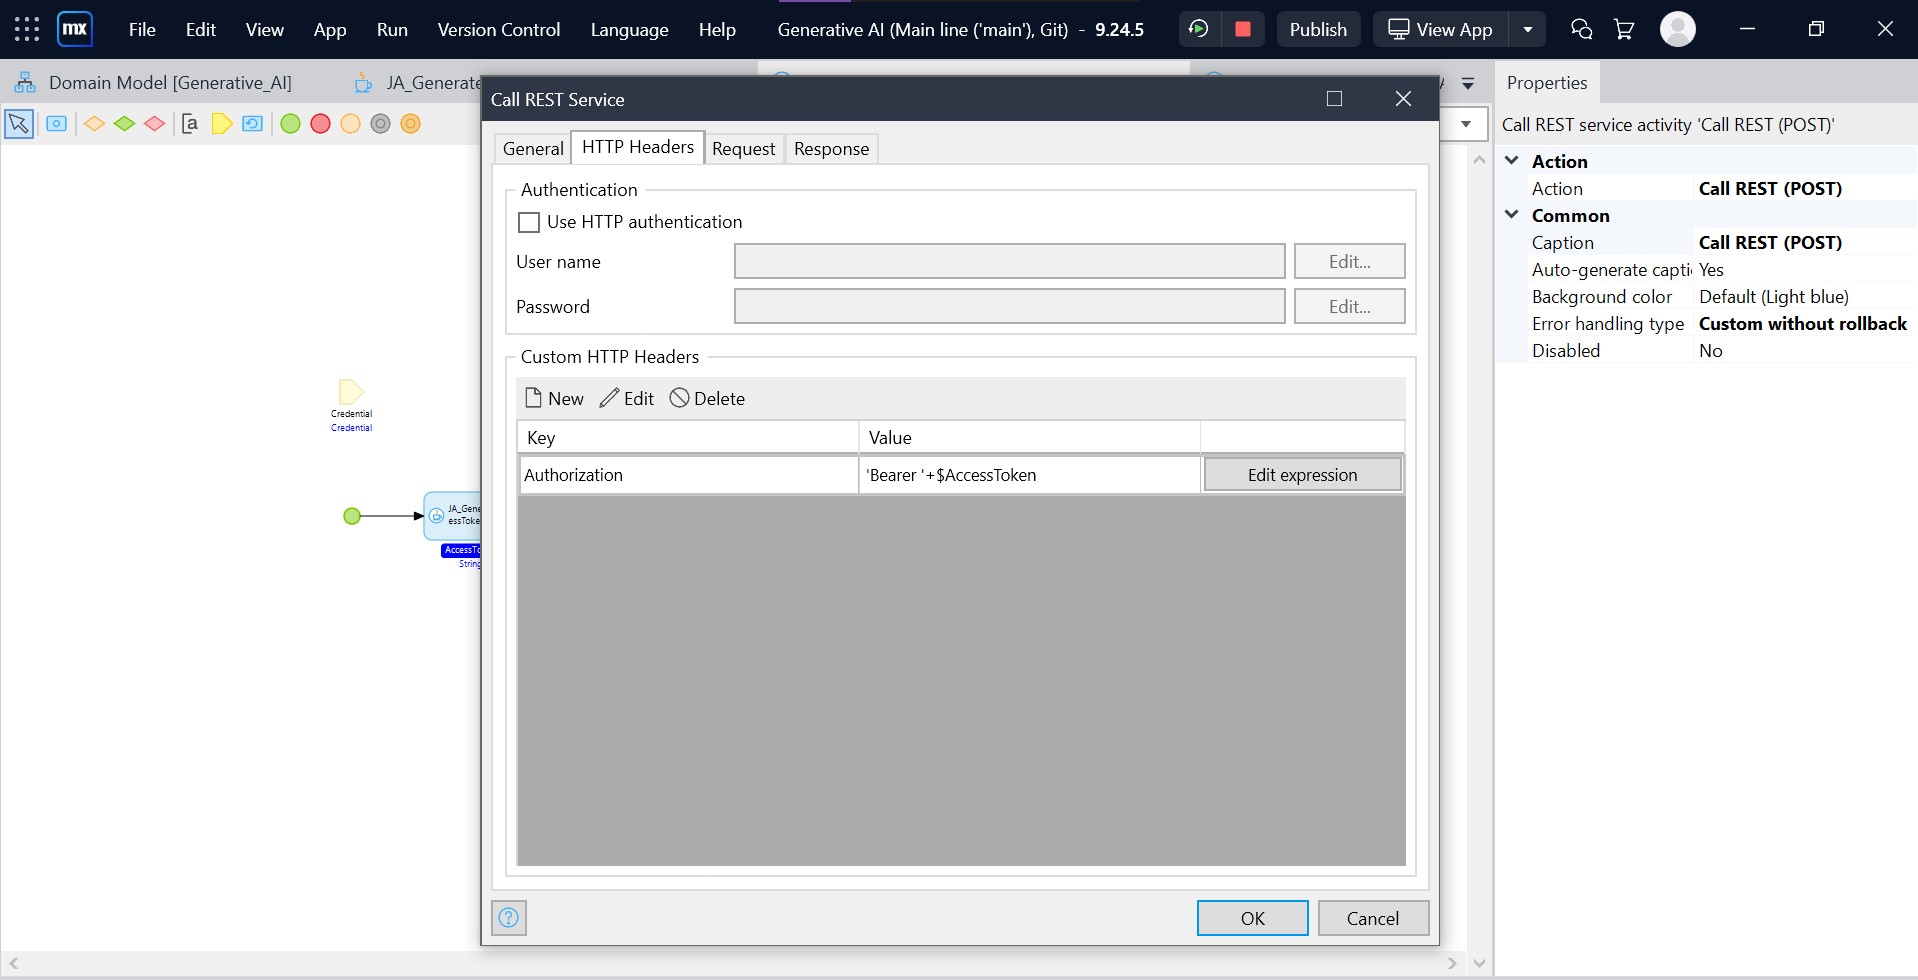
3.Create a request body to send to the API endpoint based on your requirements.
When you run this Microflow, you will receive a response, which will look like the one below:

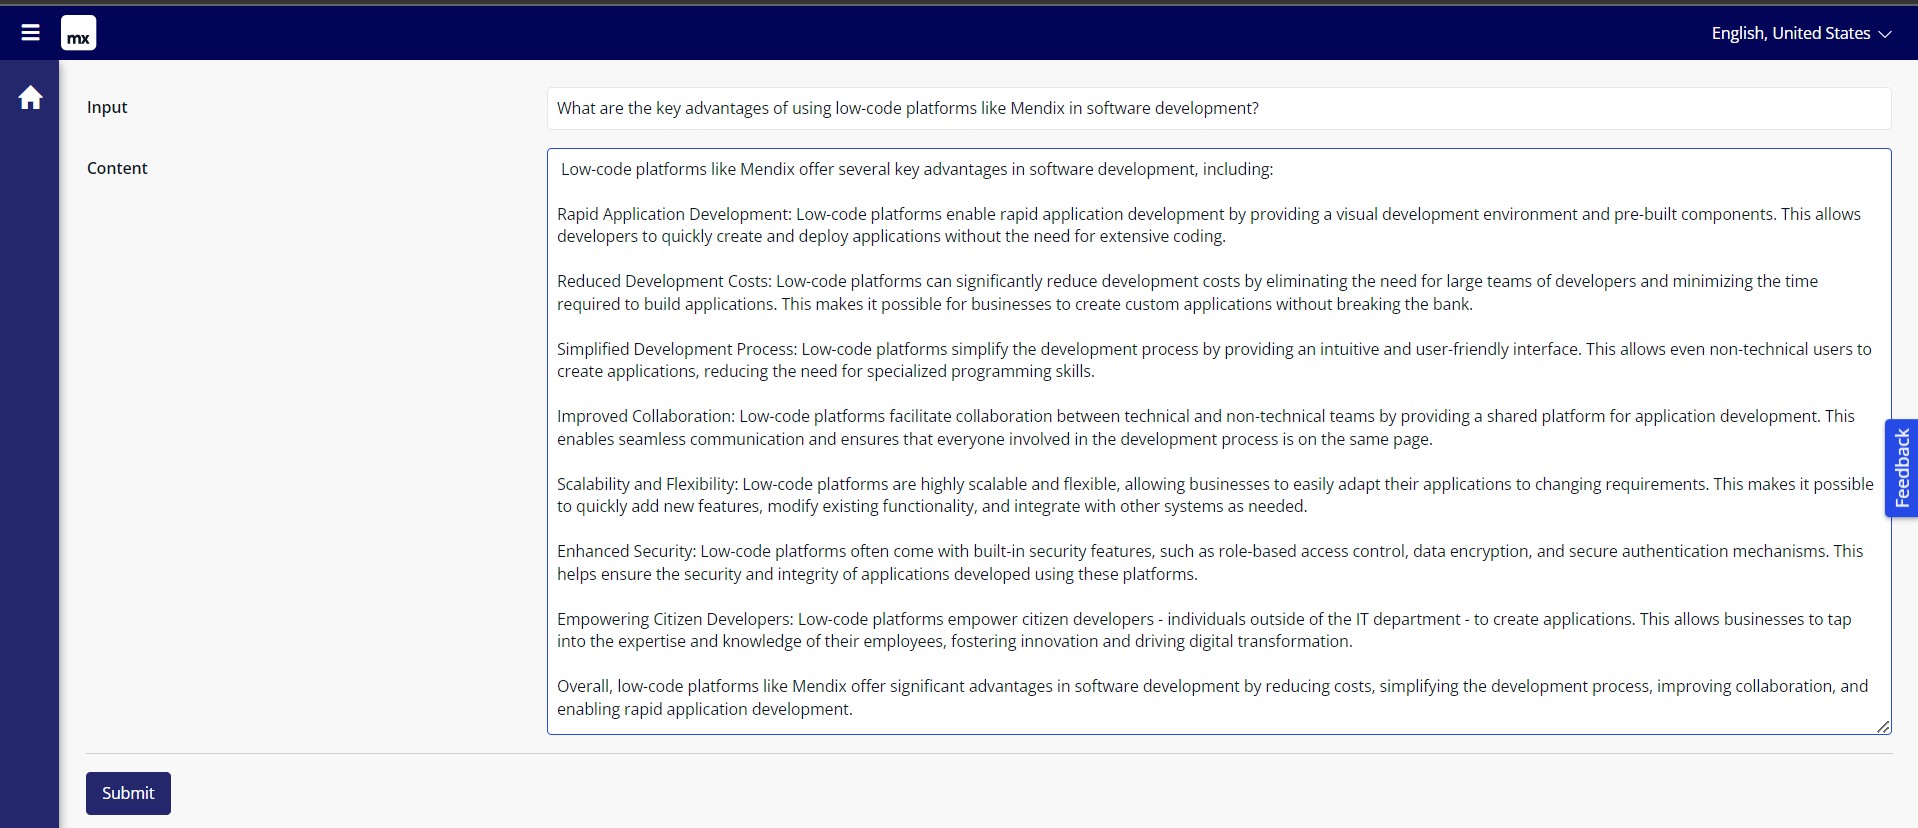
We have successfully made the call to the Vertex AI API 🚀. If the output does not meet your expectations, you can adjust the parameter values to obtain a response that is either more creative or more predictable, depending on your requirements. 🤖
In this blog post, we have demonstrated how to utilize the Text Bison model in Generative Studio using the Vertex AI API 📚. Additionally, we have showcased the authentication process using a Java action that utilizes the Google Cloud Java library. It's important to note that this example represents just one of the many possibilities for using this model. There are numerous other creative and innovative ways to leverage the capabilities of the PaLM 2 APIs, and we encourage you to explore and experiment to discover new applications and possibilities. 🌌 ✨
References:
-
Vertex AI documentation : https://cloud.google.com/vertex-ai/docs
-
Generative AI on vertex : https://cloud.google.com/vertex-ai/docs/generative-ai/learn/overview
-
GitHub Java action code : https://github.com/M-Satish/generate-access-token/blob/main/JA_GenerateAccessToken.java