Introduction:
Google Cloud Platform (GCP) offers a powerful suite of cloud computing services, and one of its key components is Google Cloud Storage. It encompasses a diverse range of cloud-based infrastructure and platform offerings, such as computing, storage, databases, machine learning, data analytics, and more. These services are hosted across Google's global network of data centers, ensuring accessibility for businesses and developers worldwide. Notable GCP services include:
-
Compute Engine : Virtual machines designed for running applications.
-
Kubernetes Engine : A managed Kubernetes service simplifying the deployment and management of containerized applications.
-
App Engine: A platform facilitating the construction and deployment of web applications.
-
Cloud Storage: Object storage tailored for storing and retrieving data.
-
Cloud SQL: A managed relational database service.
-
Big Query: A data warehouse for analyzing extensive datasets.
-
Cloud AI: Services dedicated to developing and utilizing artificial intelligence applications.
-
Cloud Machine Learning Engine: A managed service streamlining the building and training of machine learning models.
In this blog post, we'll explore how to seamlessly integrate Google Cloud Storage with Mendix, a popular low-code application development platform.
Prerequisites:
Before diving into the integration process, ensure you have a Google Cloud Platform account, which can be easily set up through the free trial offering.
Once you have successfully created a new account, proceed with the following steps to continue.
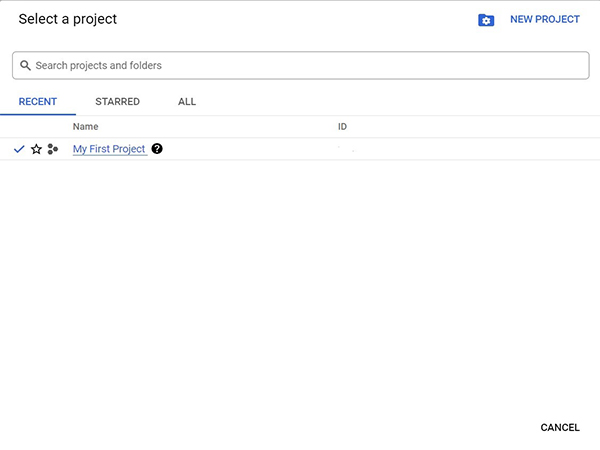
Step 1 :
Create a New Project in GCP
-
Begin by creating a new project within the Google Cloud Platform. This project will serve as the foundation for integrating Google Cloud Storage with your Mendix application.
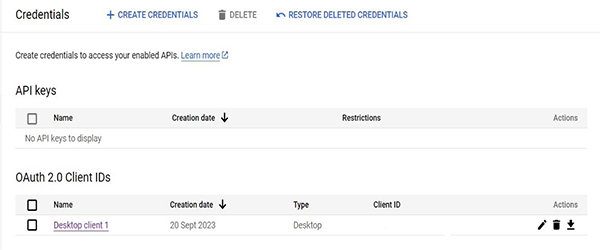
Step 2 :
Obtain OAuth Authentication Credentials
-
Navigate to the APIs and Services tab in GCP, then proceed to Credentials and create OAuth authentication credentials. Save the generated Client ID and Client Secret for later use.
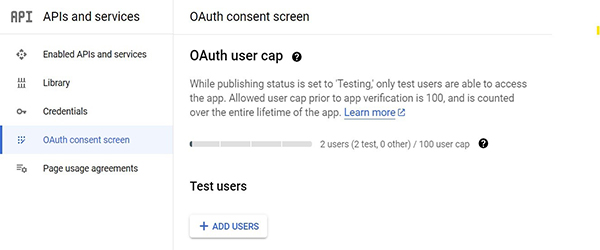
Step 3 :
Restrict Access and Test Users
-
Enhance security by restricting access to your Google Cloud Storage service. Add specific user emails to the OAuth consent screen under "Test Users" to control who can access the service.
Steps involved in creating a Module:
Creating and managing modules in the Google Cloud Platform (GCP) involves several essential steps. A crucial part of this process is generating an OAuth 2.0 access token, which is necessary for accessing GCP services. This token is obtained by creating a URL and redirecting users to it. Here's an example of the URL format:
https://accounts.google.com/o/oauth2/v2/auth?
scope=https%3A//www.googleapis.com/auth/drive.metadata.readonly&
include_granted_scopes=true&
response_type=token&
state=state_parameter_passthrough_value&
redirect_uri=https%3A//oauth2.example.com/code&
client_id=client_id
Parameters that are required to handle the above request:
URL : https://accounts.google.com/o/oauth2/v2/auth?
scope = https%3A//www.googleapis.com/auth/drive.metadata.readonly&
include_granted_scopes = true&
response_type = token&
state = state_parameter_passthrough_value&
redirect_uri = https%3A//oauth2.example.com/code&
client_id = Client id you obtained after creating client IDs in GCP portal
Once the URL is generated, users enrolled in the test users’ section in GCP can authenticate and receive the access token. It's important to note that only users listed in the test users’ section can obtain the access token.
After obtaining the access token, you can perform various actions in GCP, such as creating and deleting buckets, uploading objects, copying objects, deleting objects, and retrieving lists of objects and buckets.
The operations which we perform related to buckets are based on REST APIs
1. Creating a Bucket:
Creating a bucket in GCP can be achieved through multiple types.
curl -X POST --data-binary @JSON_FILE_NAME \
-H "Authorization: Bearer OAUTH2_TOKEN" \
-H "Content-Type: application/json" \
URL : https://storage.googleapis.com/storage/v1/b?project=PROJECT_IDENTIFIER
Where:
-
JSON_FILE_NAME is name of the JSON file
-
OAUTH2_TOKEN is the access token
-
PROJECT_IDENTIFIER is the ID or number of the project with which your bucket will be associated. For example, my-project.
Request body:
{
"name": "BUCKET_NAME",
"location": "BUCKET_LOCATION",
"storageClass": "STORAGE_CLASS",
"iamConfiguration": {
"uniformBucketLevelAccess": {
"enabled": true
},
}
}
Where:
-
BUCKET_NAME is the name you want to give your bucket, subject to naming requirements. For example, my-bucket.
-
BUCKET_LOCATION is the location where you want to store your bucket's object data. For example, US-EAST1.
-
STORAGE_CLASS is the default storage class of your bucket. For example, STANDARD.
2. Deleting a Bucket:
Deleting a bucket in GCP involves,
curl -X DELETE -H "Authorization: Bearer OAUTH2_TOKEN" \
URL : https://storage.googleapis.com/storage/v1/b/BUCKET_NAME
Where:
-
OAUTH2_TOKEN is the access token.
-
BUCKET_NAME is the name of the bucket to delete. For example, my-bucket
3. Uploading Objects from Files:
You can upload files to your bucket using the following parameters:
curl -X POST --data-binary @OBJECT_LOCATION \
-H "Authorization: Bearer OAUTH2_TOKEN" \
-H "Content-Type: OBJECT_CONTENT_TYPE" \
URL : https://storage.googleapis.com/upload/storage/v1/b/BUCKET_NAME/o?uploadType=media&name=OBJECT_NAME
Where:
-
OBJECT_LOCATION is the local path to your object. For example, Desktop/dog.png.
-
OAUTH2_TOKEN is the access token.
-
OBJECT_CONTENT_TYPE is the content type of the object. For example, image/png.
-
BUCKET_NAME is the name of the bucket to which you are uploading your object. For example, my-bucket.
-
OBJECT_NAME is the URL-encoded name you want to give your object. For example, pets/dog.png, URL-encoded as pets%2Fdog.png.
4. Copying an Object:
You can copy objects from one bucket to another using the following parameters:
Where:
-
destinationBucket is the name of the bucket in which to store the new object
-
destinationObject is the name of the new object.
-
sourceBucket is the name of the bucket in which to find the source object.
-
sourceObject is the name of the source object.
5. Deleting an Object:
You can delete an object using the following parameters:
URL : https://storage.googleapis.com/storage/v1/b/bucket/o/object
Where:
-
bucket is the Name of the bucket in which the object resides.
-
Object is the name of the object.
6. Getting Objects List:
Retrieve all objects in a bucket using the following command:
curl -X GET -H "Authorization: Bearer OAUTH2_TOKEN" \
URL : https://storage.googleapis.com/storage/v1/b/BUCKET_NAME/o
Where:
-
OAUTH2_TOKEN is the access token.
-
BUCKET_NAME is the name of the bucket whose objects you want to list. For example, my-bucket.
7. Getting Buckets List:
Retrieve a list of all created buckets using the following command:
curl -X GET -H "Authorization: Bearer OAUTH2_TOKEN" \
URL : https://storage.googleapis.com/storage/v1/b?project=PROJECT_IDENTIFIER
Where:
-
OAUTH2_TOKEN is the access token.
-
PROJECT_IDENTIFIER is the ID or number of the project containing the buckets you want to list. For example, my-project.
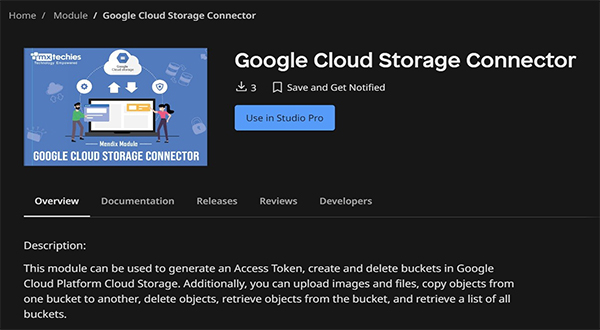
These steps cover essential actions for managing buckets and objects in GCP. Additionally, you can explore the Google Cloud Storage connector module available in the Mendix marketplace for seamless integration with Mendix.
Configuring Google Cloud Storage Connector in Mendix:
Utilize the Google Cloud Storage connector module that I have published on the Mendix Marketplace.
Update Constants:
-
Modify the ClientID, ClientSecret, RedirectUri and ProjectID constants in the Constants folder with the credentials obtained from GCP.
Configure Access Token Generation:
-
Set up the Generate_AccessToken page to obtain the necessary access token for communication with Google Cloud Storage.
-
Ensure that the email provided is updated in the Test Users section of Google Cloud Platform (GCP) to obtain the access token.
Bucket Operations:
-
Configure the Bucket_Operations page to perform operations related to buckets in Google Cloud Storage.
-
Configure the CreateBucket and DeleteBucket page to create and delete a bucket in Google Cloud Storage.
Update RedirectUri:
-
Adjust the RedirectUri constant based on the 'Callback' service provided in the module under the Resources folder.
Example: 'http://localhost:8081/rest/myservice/v1/callback'
Implementation Steps:
1. Click "Generate Access Token" button
This action will generate the access token required for authenticating and communicating with Google Cloud Storage. Upon successful authentication, you will be able to observe the generation of the access token on the page.
2.Utilize Module Pages:
The module includes multiple pages that can be reused for various bucket-related operations, streamlining development within Mendix. Ensure you update the required information so that you can carry out all operations related to buckets.
Conclusion:
By following these step-by-step instructions, you can seamlessly integrate Google Cloud Storage with Mendix, unlocking the power of cloud-based solutions within your low-code applications. The provided Google Cloud Storage Connector in the Mendix Marketplace simplifies the integration process, allowing developers to focus on building robust applications with enhanced storage capabilities.